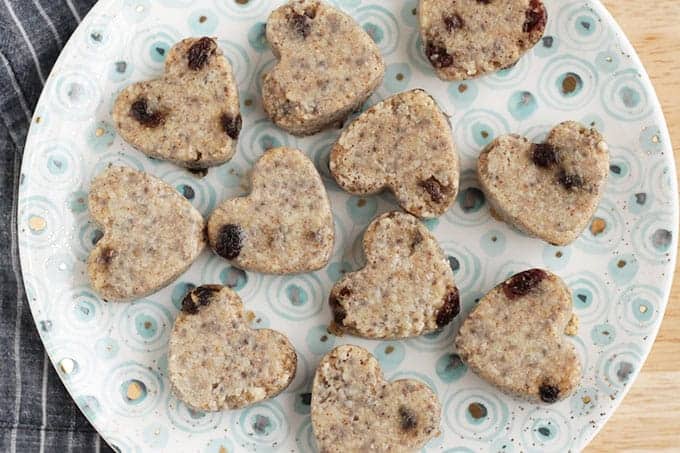
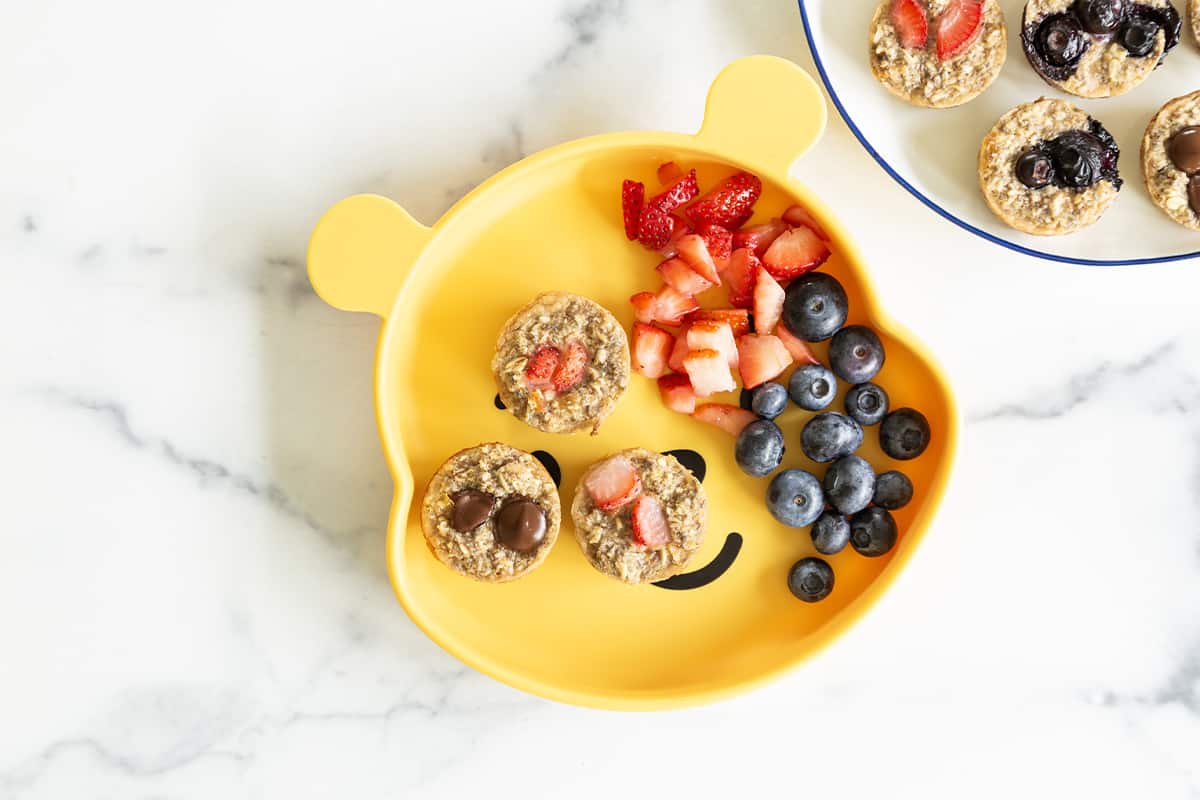
These easy Baked Oatmeal Cups are an ideal way to serve oatmeal to babies, baby-led weaning style, and to toddlers who like to feed themselves. (And to anyone who wants an easy breakfast option.) Oatmeal as finger food with much less mess? Yes, please!
Baked Oatmeal Cups
I love this method of making oatmeal into little cups that can be eaten with hands or a fork—because they are so easy to make ahead and stash in the fridge for easy kids breakfasts. You can make these in either a mini muffin tin or a silicone mold, and both will create little oatmeal bites that are super yummy.
The ingredients are basically the same as you use to make a bowl of oatmeal, but the result is easy to pick up and bite and may have a more appealing texture for some kids.
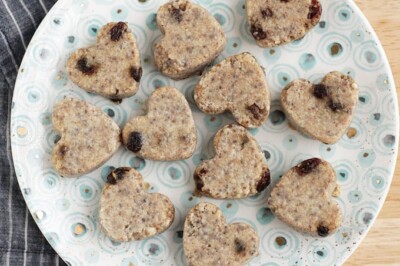
These oatmeal cups use chia seeds to help bind them together and are a great source of healthy fats, fiber, and protein. I love this cinnamon-raisin flavor, but there are a lot of variations to try.
Table of Contents
Your toddler won’t eat? Help is here!
Sign up for our email updates to get tips and ideas sent to your inbox.
Ingredients You Need
To make this easy kids breakfast idea, you’ll need to have the following ingredients on hand and ready to go.
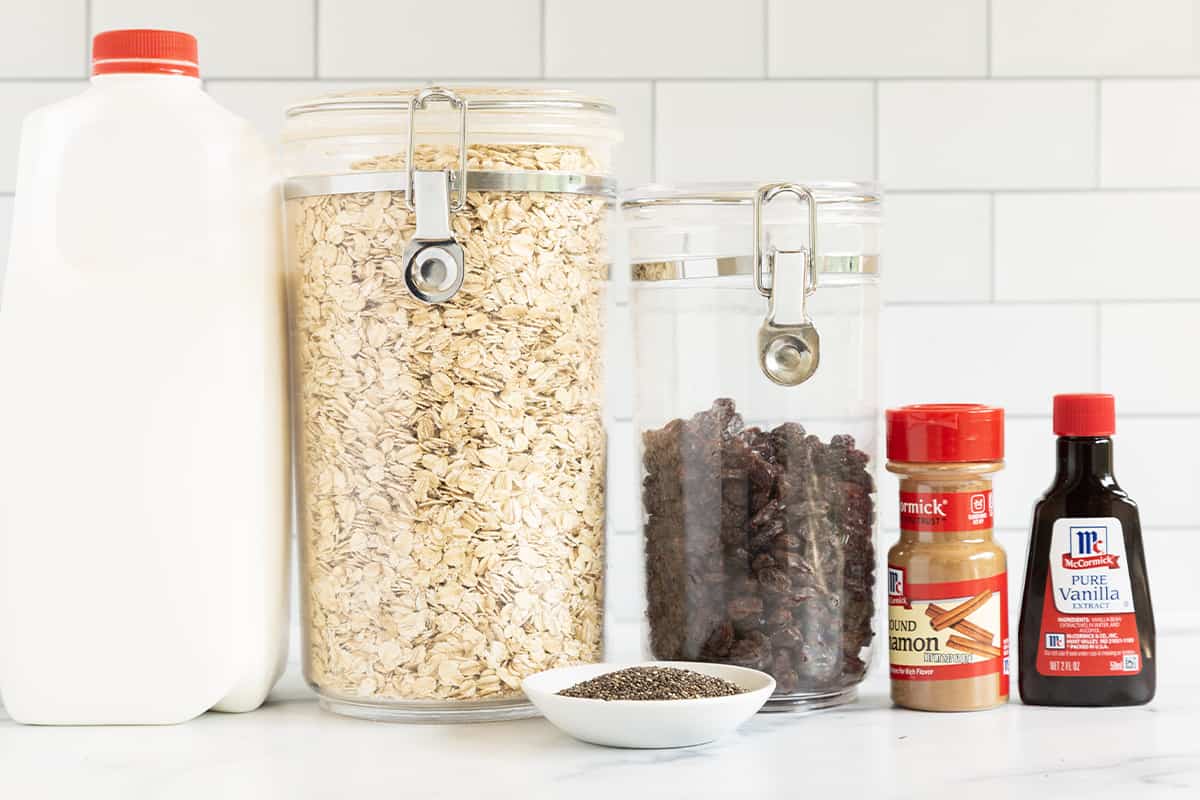
- Rolled oats: I use rolled oats in this recipe, which are sometimes also called “old-fashioned oats.” For a more uniform final texture, I like to grind up the oats slightly in a food processor or blender. You can also use store-bought quick or instant oats.
- Milk: I prefer to use dairy milk as the liquid in this recipe, which softens the oats and adds calcium and protein. You can use nondairy milk, if needed, to make them dairy-free.
- Chia seeds: These seeds help the mixture hold together when baked. (And they allow the baked oatmeal to be egg-free so more kids can enjoy them.)
- Cinnamon: I love adding cinnamon and vanilla to this recipe for flavor.
- Raisins: I use raisins with the cinnamon in this recipe, but there are so many options including blueberries, diced strawberries, grated apple, and grated sweet potato.
- Maple syrup or honey, optional, to make these a little sweeter.
Step-by-Step Instructions
Here’s a preview of this recipe so you know what to expect from the process. Scroll down to the end of the post for the full amounts and timing.
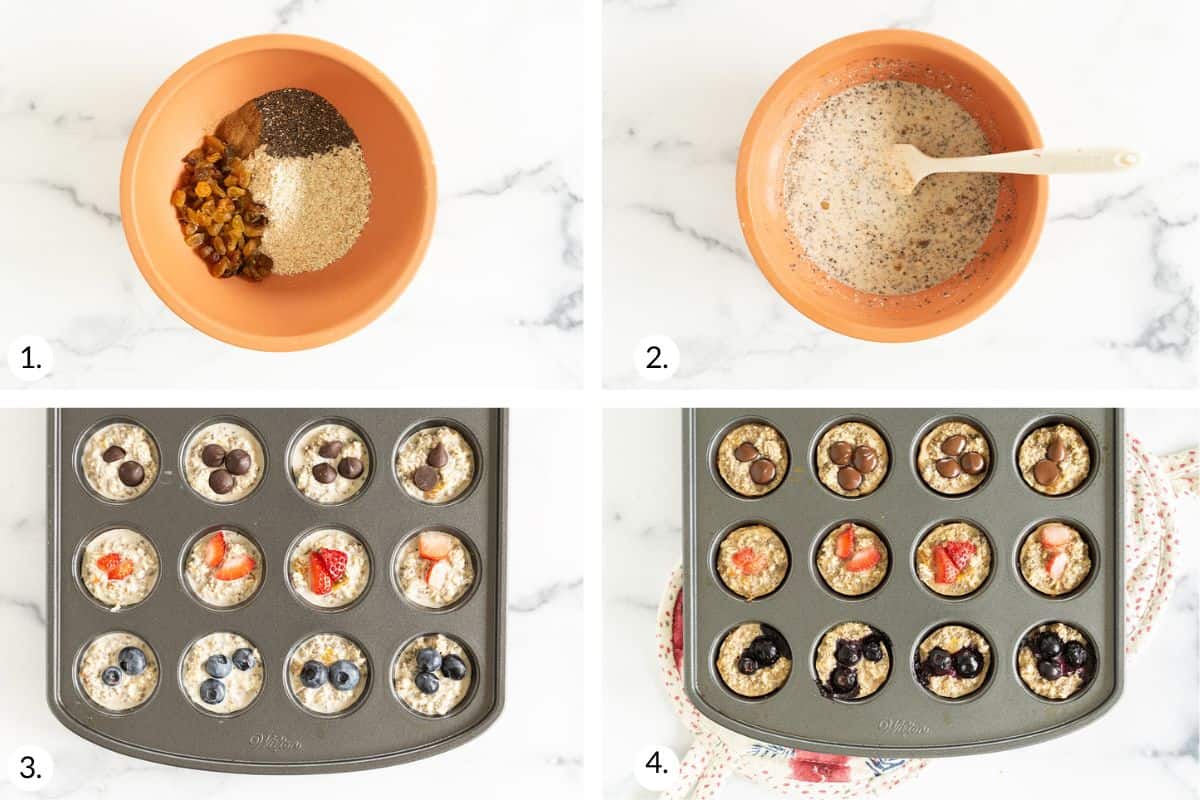
- Place the oats and chia seeds in a medium or large bowl and stir in the hot milk or water. Add the cinnamon, vanilla, dried fruit, and honey.
- Stir well. Let sit.
- Press the batter of wet ingredients into each mold or mini muffin cup. Bake!
- These store well in the fridge, so you can plan to serve the batch throughout the week. You can serve them slightly warmed or cold, according to what your kiddo prefers. (My middle kiddo ate a lot of these cold, packed in day care lunches, when she was 1 years old!)
Chia Seeds 101
Chia seeds plump up and gel as they absorb the liquid, which is so handy for helping to hold the batter together. And since the seeds also add a dose of healthy fats and fiber, it’s a simple way to pack this meal with a little extra nutrition. The texture of the chia seeds blends in nicely with the rest of the ingredients.
How to Store
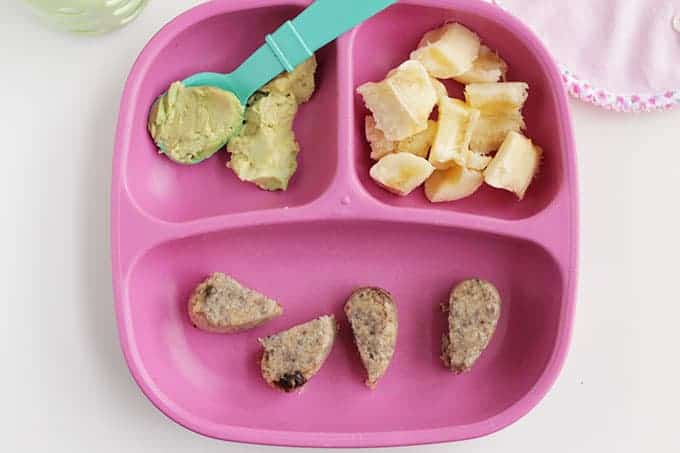
I like to make a quick batch of this baked oatmeal and have it on hand for busy mornings. I also pack the bites in lunches and serve them as snacks. You can dice them for older babies and younger toddlers to make them a little easier to eat—and limit too much food being stuffed into a little mouth.
Store in an airtight container in the fridge for about 5 days or for a few months in a bag in the freezer. Warm in the microwave or serve cold or at room temperature.
Best Tips for Success
- You can use dairy or nondairy milk (such as almond milk, oat milk, or other option you like) in this recipe according to your preferences. If you use nondairy milk, check to see if it’s flavored or sweetened before adding the vanilla or optional sweetener. You may not need either.
- Avoid honey for babies under 1.
- Grind the oats in a food processor or blender, or use instant oats.
- You can use raisins or other dried fruit (cranberries, cherries, and the like) or chopped fresh blueberries or raspberries. You may want to cut bigger pieces of fruit with scissors or a knife. You can also add chocolate chips or top with peanut butter.
- Find more of my favorite breakfast meal prep options and my Apple Cinnamon Baked Oatmeal.
- Use gluten-free oats if needed.
Related Recipes
Baby Food
Easiest Baby Oatmeal
Muffins
Easy Banana Oatmeal Muffins
Breakfast
Easy Instant Oatmeal
Breakfast
Easy Apple Baked Oatmeal
I’d love to hear your feedback on this recipes, so please comment below to share!
Baked Oatmeal Cups
Ingredients
- ½ cup rolled oats (ground in a food processor or blender, or use quick oats)
- 1 tablespoon chia seeds
- ¼ teaspoon cinnamon
- ½ teaspoon vanilla extract
- 2 tablespoons raisins or other dried fruit snipped into small pieces
- 1 teaspoon maple syrup or honey (optional)
- ¾ cup milk, warmed until hot (but not boiling)
Instructions
- Preheat the oven to 375 degrees F. Grease the silicone molds or mini muffin tin.
- Place the oats, chia seeds, cinnamon, vanilla, raisins, and maple syrup or honey, if using, into a medium bowl.
- Add the warm milk and stir. Let sit for 5 minutes.
- Press about 1 tablespoon batter into each mold or mini muffin cup. Bake for 10-14 minutes, or until the oatmeal is set and golden brown around the edges.
- Remove from oven and let cool in pan for 5-10 minutes, then on a wire rack. Serve slightly warm or chilled.
Notes
- Store in an airtight container in the fridge for about 3 days.
- You can use dairy or nondairy milk in this recipe according to your preferences. Both work just the same. If you use nondairy milk, check to see if it’s flavored or sweetened before adding the vanilla or optional sweetener. You may not need either.
- Avoid honey for babies under 1.
- Grind the oats in a food processor or blender, or use instant oats, if desired, for a smoother texture.
- You can use raisins or other dried fruit (cranberries, cherries, and the like) or chopped fresh blueberries or raspberries. You may want to cut bigger pieces of fruit with scissors or a knife.
- You can use leftover cooked oatmeal in this recipe, too, though it works best with cooked oatmeal that’s thick. Simply stir 1 tablespoon chia seeds and 1-3 tablespoons milk into cooked oatmeal and proceed with Step 3 of the recipe.
- Serve with fruit, a smoothie, or a drink as breakfast or even lunch. They work for snack, too!
Nutrition
This recipe was first posted January 2019.



Do you think you could use breastmilk??
I bet you could
Delicious! I wanted to eat the whole batch. However I improvised the recipe by adding a third of a banana mashed up, and a table spoon of unsweetened apple sauce. They did come out a little mushy but we didn’t mind. After they were done I ended up turning them upside down and leaving them in the oven with the oven off just to hopefully help with the mushyness. I think they were great and even better mushy for a younger baby.
Can I substitute banana for the maple syrup?
I bet that would work well.
Hi! Do you happen to know what temp/how long to bake for, if using a standard muffin pan? Thank you!
My one and three year old loved these! We were out of raisins so I snipped a few dried apricots into very small pieces – 3 apricots worked perfectly. I’ll definitely make them again.
Hi – do you think baby oatmeal would work in this recipe?
It won’t have the same final texture and the flavor may be different if it’s fortified with iron, but it might work okay. I haven’t tried it so I can’t say for sure.
My 17 month old LOVES this! Thanks for the recipe 👌
Hi, can I use fresh bananas for this and water instead of milk?
Sorry, one more question: what consistency should the ground oats be? Like flour?
Thanks
Yes like a coarse flour.
Yes you can use milk. For banana, I think that would work as long as you dice them finely.
Could I add fresh apples in these instead of the other fruit? Looking to use some that are about to go bad and need an easy snack for on the road!
I would grate it and squeeze it dry to ensure it cooks through and doesn’t make them too moist. Or very finely dice them. If they are too big, they won’t cook in the time stated in the recipe. Hope that helps!
Would love to try making these but do they store well in the freezer? I only see fridge guidelines. Thanks!!
Sure, you can freeze once cooled in a freezer bag in one layer for up to 6 months. Thaw in the fridge, at room temperature or for about 15 seconds in the microwave.
These are so yummy and perfect! Recipe was so easy and they came out great. My 9m old likes oatmeal but wanted to feed herself – she loves these! Thank you!
I’m so glad!
These are delightful! I wish I had doubled the recipe. I love that they can be eaten right out of the fridge and the texture is so nice.
Making another batch, now.
I made this with dried cherries because that’s what I had and made no other substitutions. My 12 month old loves these! I make a double batch every week. This recipe was one of the first finger foods he accepts besides puffs and cheerios and helped transition him to all kinds of different foods. Thank you for sharing this recipe!
I’m so glad to hear that!
This was genius. I used steel cut oats (all I had) and worried it would be too chewy or wouldn’t cook through but it was great! Been looking for a way to incorporate oatmeal into my finger-food-loving 1-year old’s diet (he gags on regular cooked oatmeal and hates it) so this is a definite win.
I’m so glad to hear that!
I love this recipe! Do you have something similar to this one ?
Taste is great, but they seem a bit soggy, and I’m afraid of I bake them longer they might get crunchy – my Tiny Human is only just now a year old so her teeth options are pretty limited if they get too hard – any suggestions?
It would be hard to make them crunchy, so I would suggest baking them a little more. They will be soft though.
Made these for my granddaughter in a mini muffin pan. She loved them! Thank you so much for the recipe.
I’m so glad to hear that!