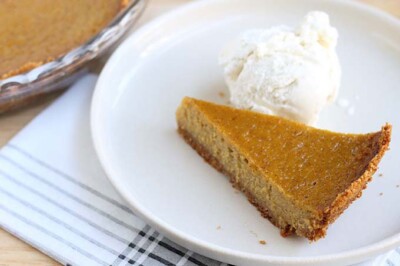
Butternut Squash Pie is a family favorite in my house, and this super easy recipe is perfect for the fall and winter holidays. It’s a delicious twist on a classic pumpkin pie and is so easy to make!
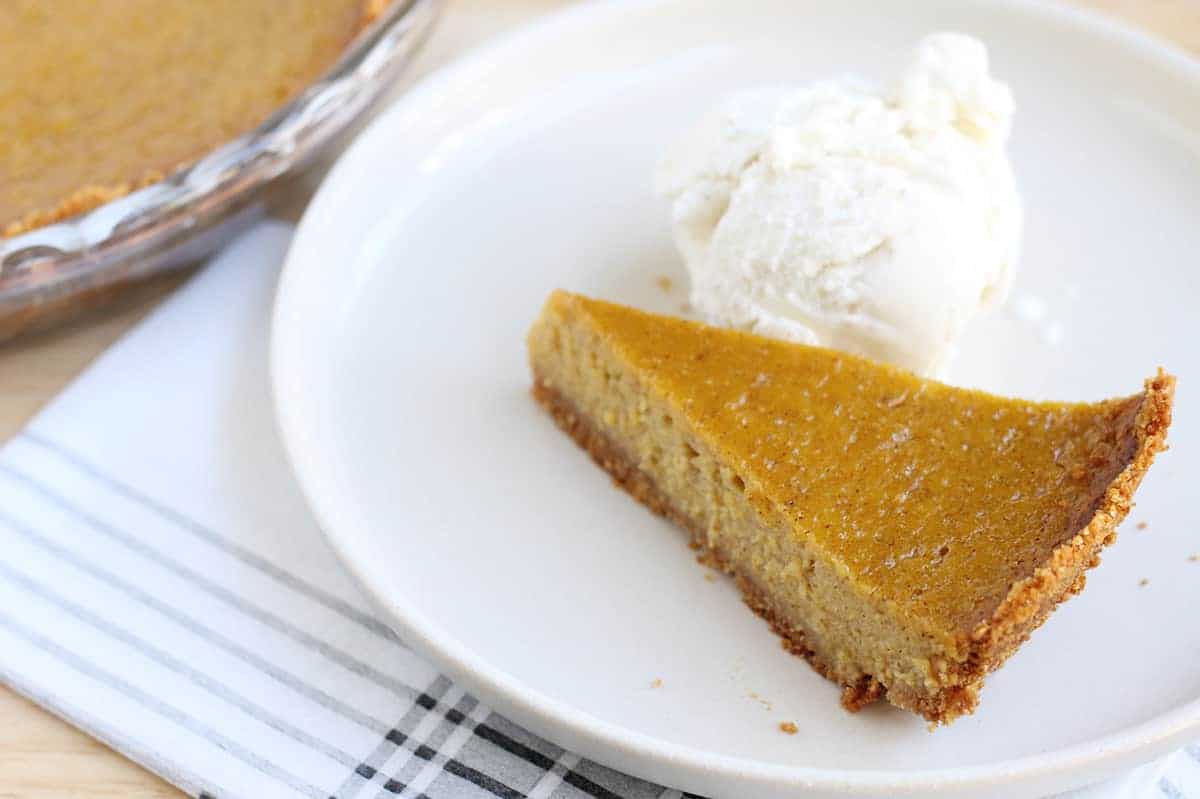
I know that most people reach for pumpkin pie come fall. But we grow butternut squash (and also find it widely available at our farmers market), so it’s the type of pie we always make as a kid-friendly Thanksgiving recipe.
We’ve been making Butternut Squash Pie for years now. It’s both an easy dessert to make for the holidays, and we think it has better flavor than pumpkin.
Plus, you can make it up to a full day ahead of time, which is ideal when you have a whole feast to make.
It’s delicious made with canned squash puree or homemade Butternut Squash Puree. And the texture and flavor is just so darn good.
(You may also like my Easy Pumpkin Pie, Easy Pumpkin Cake, Cranberry Apple Pie, and make-ahead Thanksgiving recipes).
Table of Contents
Your toddler won’t eat? Help is here!
Sign up for our email updates to get tips and ideas sent to your inbox.
Ingredients You Need
To make this Butternut Squash Pie, you’ll need to have the following ingredients on hand and ready to go.
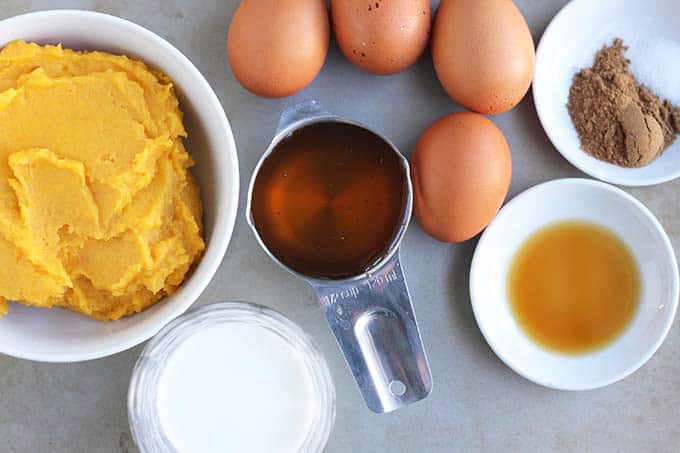
- Butternut squash: You can make your own butternut squash puree or buy it canned from the store.
- Eggs: I use large eggs in my baking, so that’s what I use here.
- Pumpkin pie spice: This adds warm spice flavor to the mix.
- Honey: I use honey to sweeten the pie. You can also use maple syrup.
- Vanilla extract: You can use pure or artificial vanilla extract in this recipe.
- Milk: I bake and cook with whole milk, so that’s what I recommend here for ultimate richness.
- Graham cracker crust: You don’t need to prepare the crust too far ahead, but it does need to chill a bit before you add the filling, so plan to do that step first. And yes, you can use a store-bought graham cracker crust if you prefer.
Step-by-Step Instructions
Here’s a look at the process involved in making this Butternut Squash Pie from start to finish. Scroll down to the bottom of this post for the full information.
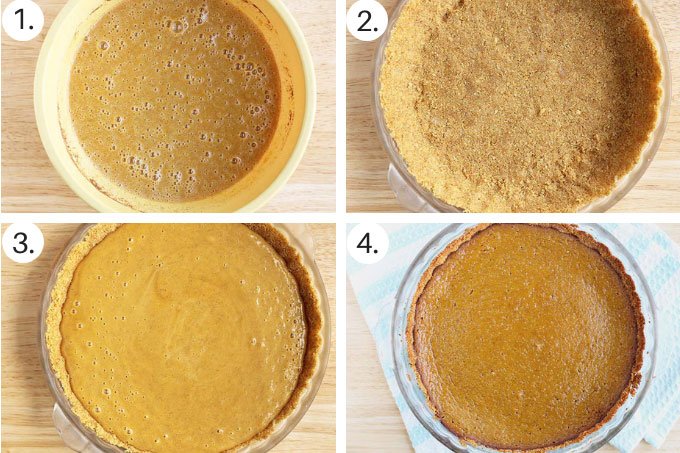
- Prepare the Graham Cracker Crust and put it into the fridge.
- Preheat the oven.
- Add the rest of the ingredients to a medium bowl. Blend until smooth.
- Pour into the prepared pie crust and bake until the filling is mostly set and firm to the touch. Let cool fully.
TIP: You can make this pie a day ahead and keep it in the fridge or at room temperature until dessert time.
You can use fresh butternut squash that’s roasted and then pureed smooth in a food processor, or canned butternut squash. If you use canned, just be sure to drain off any liquid that settles at the top.
We love the flavor of fresh squash (and the convenience of using a piece of produce we have from the garden) but it’s super delicious with canned squash too so no worries if you don’t have access to a whole squash.
You can totally swap in pumpkin puree for squash puree! It works nearly identically.
If you’d like to make this butternut squash pie gluten-free, simply use gluten-free graham cracker crumbs. To make this dairy-free, use unsweetened plain nondairy milk.
After about an hour of cooking, the center of the pie may still be a little less firm than the edges; It will continue to cook a little as it cools so as long as the majority of the pie is firm to the touch (as in you touch it with your finger and no batter comes off), it should be done. Let it cool fully on a wire rack.
Tips for Graham Cracker Crusts
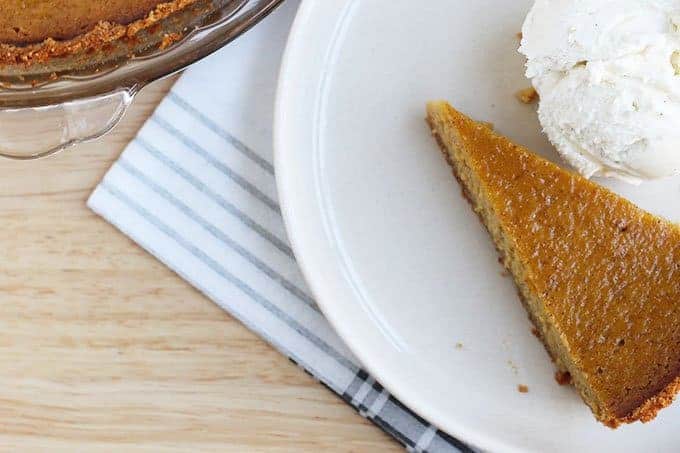
After about 30 minutes of cooking, place a tented piece of foil over the pie to prevent the crust from over-browning. So tear off a big piece of foil and crease it in the center. Place that, tent-like, over the pie to cover it without letting the foil touch the filling.
You can also use a pie crust shield.
How to Store
We prefer to eat this Butternut Squash Pie chilled, so I almost always make it either a full day ahead or in the morning of the day that we plan to eat it. Cover it with foil or plastic wrap when you put it into the fridge after letting it cool to at room temperature on a wire rack.
Best Tips for Success
- Use homemade squash puree or canned. Sub in pumpkin puree if desired.
- Use nondairy plain unsweetened milk if desired.
- Use maple syrup instead of honey if desired.
- To prevent the crust from becoming too brown, after about 30 minutes of cooking, place a tented piece of foil over the pie or use a pie crust shield.
- You can use a store-bought graham cracker crust if you prefer.
- Plan to let the pie cool fully before slicing and serving.
- You can make this pie up to a day ahead and store covered with plastic wrap in the fridge or at room temperature.
- We prefer to eat this chilled though room temperature is delicious, too.
Related Recipes
Desserts
Favorite Cranberry Apple Pie
Desserts
Favorite Sweet Potato Brownies
Desserts
Healthy Pumpkin Cookies
I’d love to hear your thoughts if you make this recipe so please comment below with your feedback and/or questions. I appreciate each comment!
Easy Butternut Squash Pie
Ingredients
Graham Cracker Crust
- 1 1/4 cup graham cracker crumbs
- 1/3 cup melted unsalted butter
- 1/4 cup sugar
Butternut Squash Pie Filling
- 14.5 ounces butternut squash puree (canned or homemade)
- 1/2 cup milk
- 1/2 cup honey
- 3 eggs
- 1 egg yolk
- 2 teaspoons pumpkin pie spice
- 1 teaspoon vanilla extract
- Whipped cream or vanilla ice cream, optional
Instructions
To make the Graham Cracker Crust:
- Mix together the graham cracker crumbs, melted butter, and sugar in a medium bowl. Press into a 9-inch pie plate to cover the bottom and about 2/3 way up the sides. Refrigerate for at least 10 minutes while you prepare the filling.
To make the pie:
- Preheat the oven to 350 degrees F.
- Add the squash, milk, honey, eggs, egg yolk, pumpkin pie spice, and vanilla to a large bowl. Stir together with a whisk or a hand-held electric mixer.
- Pour into the prepared pie crust and bake for 55-65 minutes or until the filling is mostly set and firm to the touch. (The center may still be a little less firm than the edges; it will continue to cook a little as it cools.) After about 30 minutes of cooking, place a tented piece of foil over the pie to prevent the crust from over-browning or use a pie crust shield.
- Let cool fully.
- Slice and serve at room temperature or chilled with ice cream or whipped cream, if desired.
Notes
- You can make this pie up to a day ahead and store covered with plastic wrap in the fridge or at room temperature.
- Use homemade squash puree or canned. Sub in pumpkin puree if desired.
- Use nondairy plain unsweetened milk if desired.
- Use maple syrup instead of honey if desired.
- To prevent the crust from becoming too brown, after about 30 minutes of cooking, place a tented piece of foil over the pie or use a pie crust shield.
- You can use a store-bought graham cracker crust if you prefer.
- Plan to let the pie cool fully before slicing and serving.
- We prefer to eat this chilled though room temperature is delicious, too.
Nutrition
This post was first published September 2019.








Hello can this be made with egg substitute?
I would use a liquid egg substitute for the best, most similar results. There is usually an option near the regular eggs in most stores.