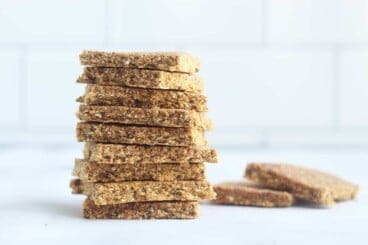
Transform pantry staples into no-bake Chewy Granola Bars to serve as an easy kids snack or breakfast. This recipe is easy to customize for your family’s preferences, which is a nice way to ensure it’s enjoyed by everyone in your home!

I love making homemade snacks from pantry ingredients I usually have in the house and these Chewy Granola Bars are such a yummy option. They are easy to stir together, don’t require any baking, and can be adjusted for your family’s flavor preference.
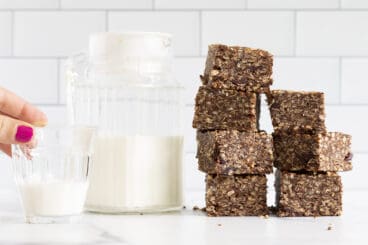
These bars are best served cold out of the fridge, so you can eat them at home or pack them as a toddler snack for on the go in a container or bag with an ice pack.
The bars have a base of oatmeal, so they are a high fiber food for kids, and are just so yummy.
(You may also like Homemade Granola Bars, Healthy Breakfast Bars, Strawberry Oatmeal Bars, and Banana Oatmeal Bars.)
Table of Contents
Your toddler won’t eat? Help is here!
Sign up for our email updates to get tips and ideas sent to your inbox.
Ingredients You Need
Here’s a look at the ingredients you need to have on hand to make Chewy Granola Bars so you know what to pick up from the store or have ready.

- Rolled oats: I like to use a base of regular old-fashioned rolled oats in these Chewy Granola Bars.
- Seeds or nuts: You can use whichever chopped nuts or small seeds you like, so adjust if needed to make the bars nut-free or to send as a peanut-free snack for school.
- Hemp seeds (or chia seeds): You can add either of these to help the batter hold together and also to boost nutrition.
- Honey: Honey is sticky and helps the no-bake bars hold their shape nicely. It also adds sweetness.
- Coconut oil: I use melted coconut oil in this recipe since it firms up when cold and helps the bars hold their shape when sliced and served.
- Vanilla extract: A little vanilla rounds out the flavors in this easy snack for kids.
- Mini chocolate chips: You can make the recipe into chocolate chip chewy granola bars by adding mini chocolate chips.
Step-by-Step Instructions
Here’s a preview of how to make these Chewy Granola Bars so you know what to expect from the process. Scroll down to the end of this post for the full information, including the amounts and the timing.

Step 1. Add dry ingredients to a blender.

Step 2. Blend until just combined.

Step 3. Add the dry ingredients to the wet ingredients and mix well.

Step 4. Press the mixture down firmly into the prepared pan. Refrigerate until firm.
Frequently Asked Questions
For this recipe, you simply mix the ingredients together, push the batter firmly into a pan, then chill in the fridge. Cut up and serve.
You can use raisins or another diced dried fruit if you prefer in place of the chocolate chips.
You can use rolled oats or instant oats in this recipe as they both work the same in the recipe.
How to Store
Store Chewy Granola Bars in the refrigerator for up to 2 months to ensure they stay fresh and hold their shape. If packing them to take on the go, pack in an insulated bag or lunch box with an ice pack to keep them cold.

Best Tips for Success
- Dip into melted chocolate for an extra-special snack bar. Place onto parchment paper and pop back into the fridge to allow the chocolate to firm up.
- Use sunflower seeds to make this snack nut-free.
- Pack with an ice pack if sending to daycare or school.
- Pair with milk, a Yogurt Drink, or a Toddler Smoothie to make the snack more substantial.
- Serve as a toddler breakfast if desired.
Related Recipes
I’d love to hear your feedback on this post, so please rate and comment below!

Chewy Granola Bars
Ingredients
- 2 cups rolled oats
- ½ cups seeds or nuts (such as sunflower seeds or walnuts)
- 2 tablespoons hemp seeds (or chia seeds)
- ¼ cup honey
- ¼ cup coconut oil (melted)
- ½ teaspoon vanilla extract
- ¼ cup mini chocolate chips
Instructions
- Line an 8×8-inch pan with parchment paper. Set aside.
- Optional: Blend or grind the dry ingredients in a food process or blender to roughly chop. This makes a more uniform mixture that can hold together a little more easily.
- Add the dry ingredients to a medium bowl with the remaining ingredients and stir together to mix into a uniform mixture.
- Press the mixture down firmly into the prepared pan, spreading it evenly to the edges and sides. (Press it down VERY firmly to ensure that it all holds together.)
- Place into the refrigerator for at least 30 minutes to firm up. Use the parchment paper to lift the mixture out of the pan, place onto a cutting board, and slice into bars.
- Store bars in the refrigerator to ensure they hold their shape.
Equipment
Notes
- Store bars in the refrigerator for up to 2 months to ensure they stay fresh and hold their shape.
- Dip into melted chocolate for an extra-special snack bar. Place onto parchment paper and pop back into the fridge to allow the chocolate to firm up.
- Use sunflower seeds to make this snack nut-free.
- Pack with an ice pack if sending to daycare or school.
- Gluten-free: Use certified gluten-free oats.


Any suggestions for natural sweetners that will work in the recipe instead of honey. Maybe apple sauce or banana?
I don’t believe either would work, since the honey helps the bars stick together. If you do try to use apple sauce or banana, they will likely just fall apart.
These were easy & fun to make with my toddler! Delicious snack for the whole family. I added raisins and some cinnamon as well.
Are raw oats safe to consume or do you soak yours first?
They soften in the mixture so I do not soak them first.
I made these and they were delicious. However, mine was very crumbly. Your picture shows that it’s pretty firm! I just used the bigger pan I had, but I re-read some of your comments on the blog post, and next time, I will buy a smaller pan and press more firmly into it, so it holds the shape better.
That should help!
I used Sunflower seeds and chia seeds. My coconut oil was very expired, so I used peanut butter and honey (a bit more than the recipe called for) and added a few craisins. I pushed it all down in a pan with the bottom of a measuring cup and let it sit overnight in the fridge. Turned out great!
FYI to Amy, the instructions at the top say to blend the dry ingredients in a blender, but the instructions within the actual recipe just say to mix everything in a bowl.
Thank you, I will fix that!