This super easy stir-together Healthy Chocolate Cake is a cinch to make and it has less sugar than traditional cakes. Maybe “healthier” is a better term, but whatever you call it, it’s so darn good! PS: It happens to be egg-free and vegan, too.
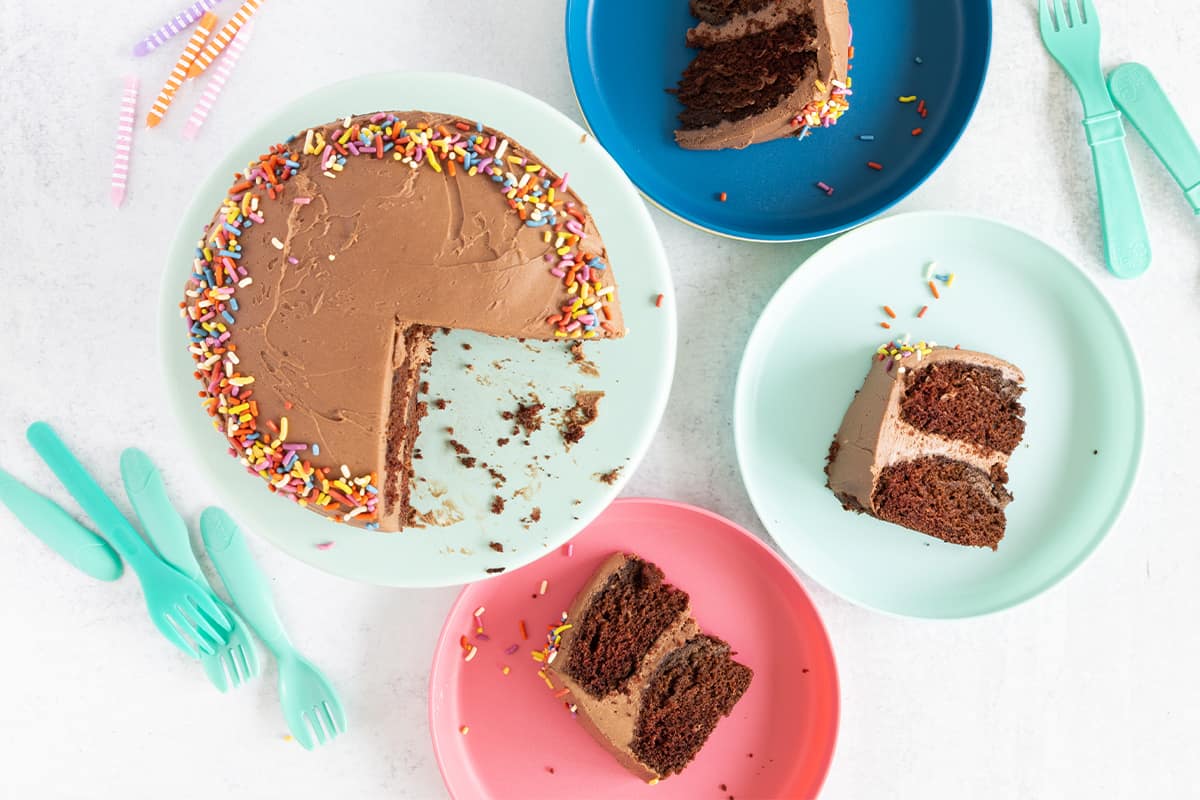
I’ve been searching for a “house cake”—you know, one that becomes the traditional cake we make for birthdays and special occasions. One that we’ll think back on fondly.
And also one that’s easy enough to make without much notice because as we all know, sometimes you just need a slice of cake for no good reason! I’m happy to say this cake fills the bill.
This cake is made with less sugar than traditional cakes (which is my personal flavor preference) and has some ingredient options so you can decide how “healthy” to make it. My whole family loves this layer cake recipe–especially as a birthday cake or a holiday dessert—because it delivers on the classic chocolate cake flavor you expect.
(I also have a delicious Easy Vanilla Cake version, a Funfetti Cake that’s also vegan, and Vegan Chocolate Cupcakes as more easy dessert options.)
Table of Contents
Your toddler won’t eat? Help is here!
Sign up for our email updates to get tips and ideas sent to your inbox.
Ingredients You Need
To make the Healthy Chocolate Cake, you’ll need to have the following ingredients on hand and ready to go.
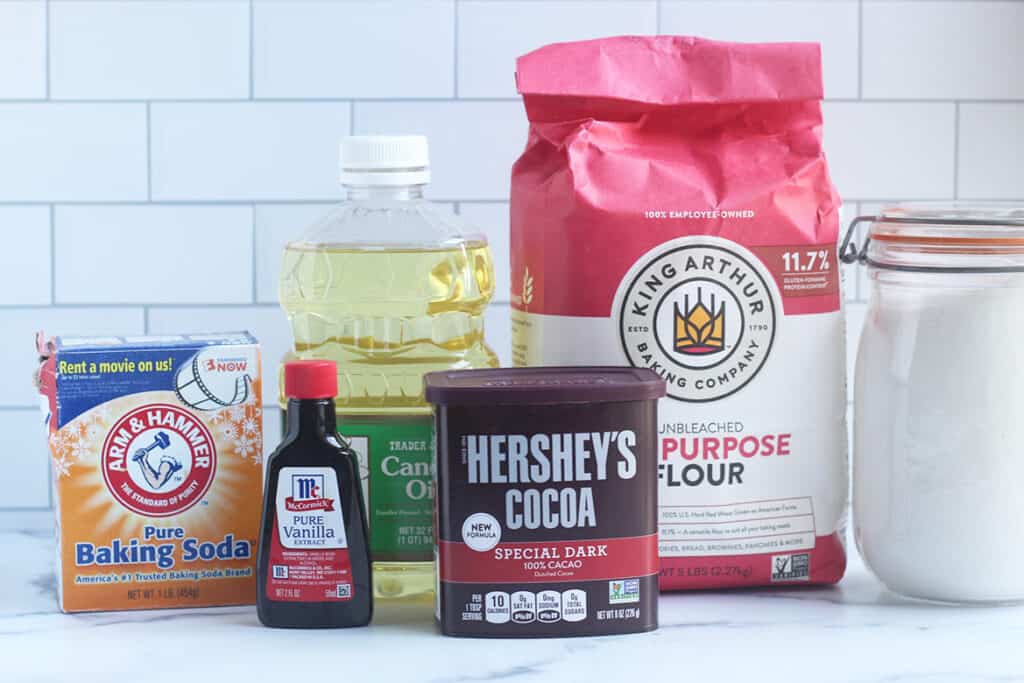
- Flour: You can use whole wheat, all-purpose, or a mixture of the two. I usually use all-purpose flour.
- Vegetable oil: I typically use canola oil or vegetable oil here, but avocado oil would work, too.
- Sugar: A little granulated sugar is the sweetener of choice in this cake because it blends in so well and adds moisture.
- Baking soda: Fresh, active baking soda helps the cake bake through and rise nicely. (This works much better than baking powder, so do be sure to use baking soda.)
- Cocoa powder: I like Saco or Hershey’s Special Dark for the best chocolate flavor.
- Salt: A dash of salt helps enhance the rest of the flavors.
- White vinegar: This works with the other ingredients to deliver the perfect texture you expect in a chocolate cake.
- Vanilla extract: Paired with cocoa powder, vanilla extract is an extra flavor note.
- Quick Chocolate Frosting: Or a frosting of your choice.
TIP: The cake is dairy and egg-free, and there’s not even any butter. You can make it gluten-free by using a gluten-free cup-for-cup flour blend. It’s like a magic cake!
Step-by-Step Instructions
Here’s the basic process of making the Healthy Chocolate Cake. Scroll down to the bottom of this post for the full recipe, including the amounts and timing.

Step 1. Stir together the ingredients in a large bowl with a whisk. Make sure you get all the lumps out of the cocoa powder.

Step 2. Divide batter evenly between two 6-inch pans (coated with nonstick spray and parchment paper rounds).

Step 3. Bake until just firm to the touch and a toothpick or cake tester inserted into the center comes out clean.

Step 4. Remove the cakes from the pans. Let cool on a wire rack.

Step 5. Place one of the cakes onto a platter or cake stand. Add a big spoonful of desired frosting and spread to cover the top.

Step 6. Add the second cake and the rest of the frosting. Spread over the top and sides.
TIP: I like making this cake in two 6-inch pans, as it’s a nice size for a smaller gathering of up to 10 people. It also means you don’t need a ton of any of the ingredients. Plus, it’s is a great size for a smash cake.
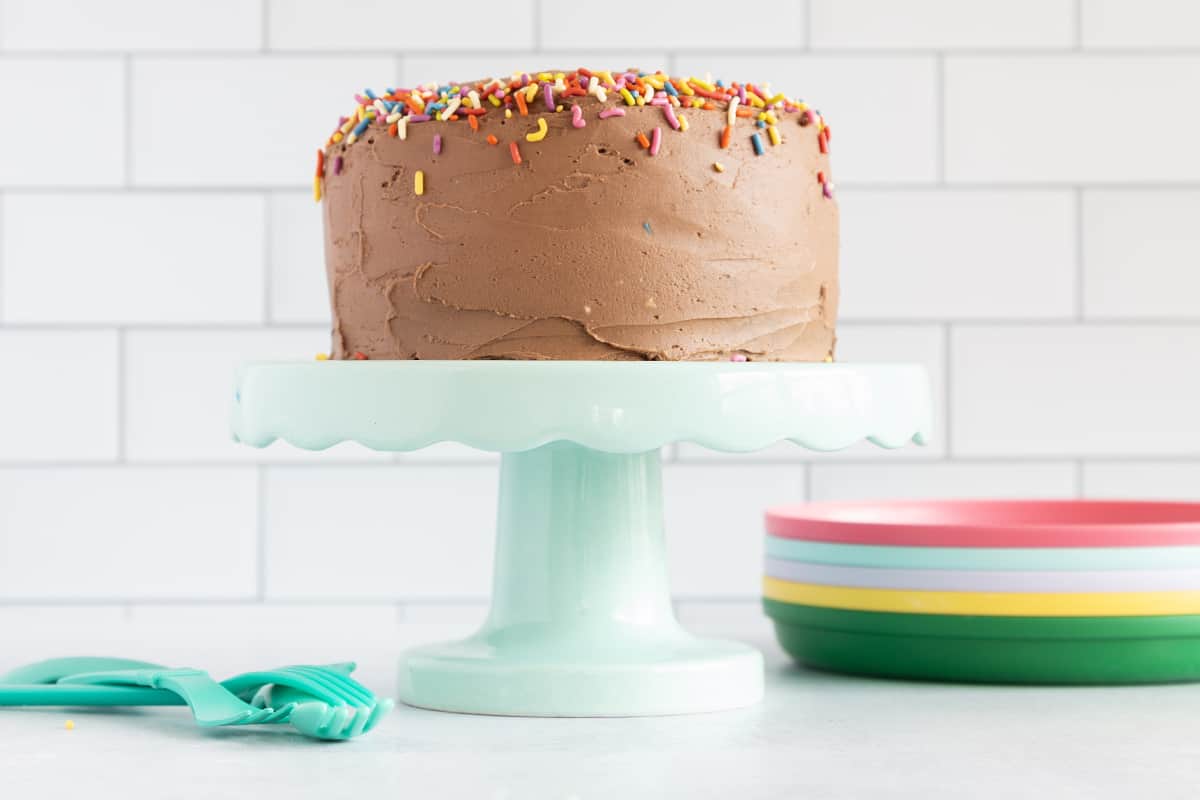
Frosting Options
Frost with my Quick Chocolate Frosting, Chocolate Cream Cheese Frosting, or Strawberry Frosting, or use any other frosting that you enjoy.
Of those options, we almost always use the Chocolate Cream Cheese Frosting for a double chocolate cake.
I use that word to signify that this cake is lower in sugar than most comparable chocolate cake recipes. I worked hard to make sure it’s plenty sweet, without being too sweet.
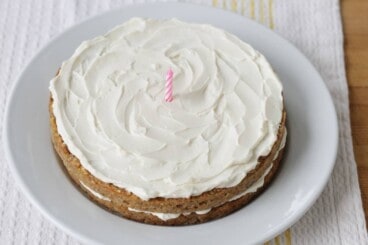
We like to use a cookie cutter to form a shape, then fill with sprinkles. We also sometimes just do chocolate frosting and forget any other decorating!
Yes, you can freeze chocolate cake and this one freezes so well. We love to do that if we want half one day and half another day a few weeks ahead. Wrap a section or slices of cake in plastic wrap and place into a freezer bag. Remove as much air as you can and freeze for up to 6 months. Thaw at room temperature or overnight in the fridge.
How to Store
You can make the Healthy Chocolate Cake layers the day before you plan to serve. Let cool fully, then place on two separate plates and wrap well with plastic wrap. Store at room temperature. Frost just before serving if possible.
Store leftovers, wrapped well in the fridge. I am partial to how this cake tastes when it’s chilled, right out of the fridge.
You can also freeze slices for future enjoyment. Wrap tightly in plastic wrap (wrapping slices on small paper plates makes this easy) and freeze for up to 6 months. Thaw at room temperature or in the fridge.
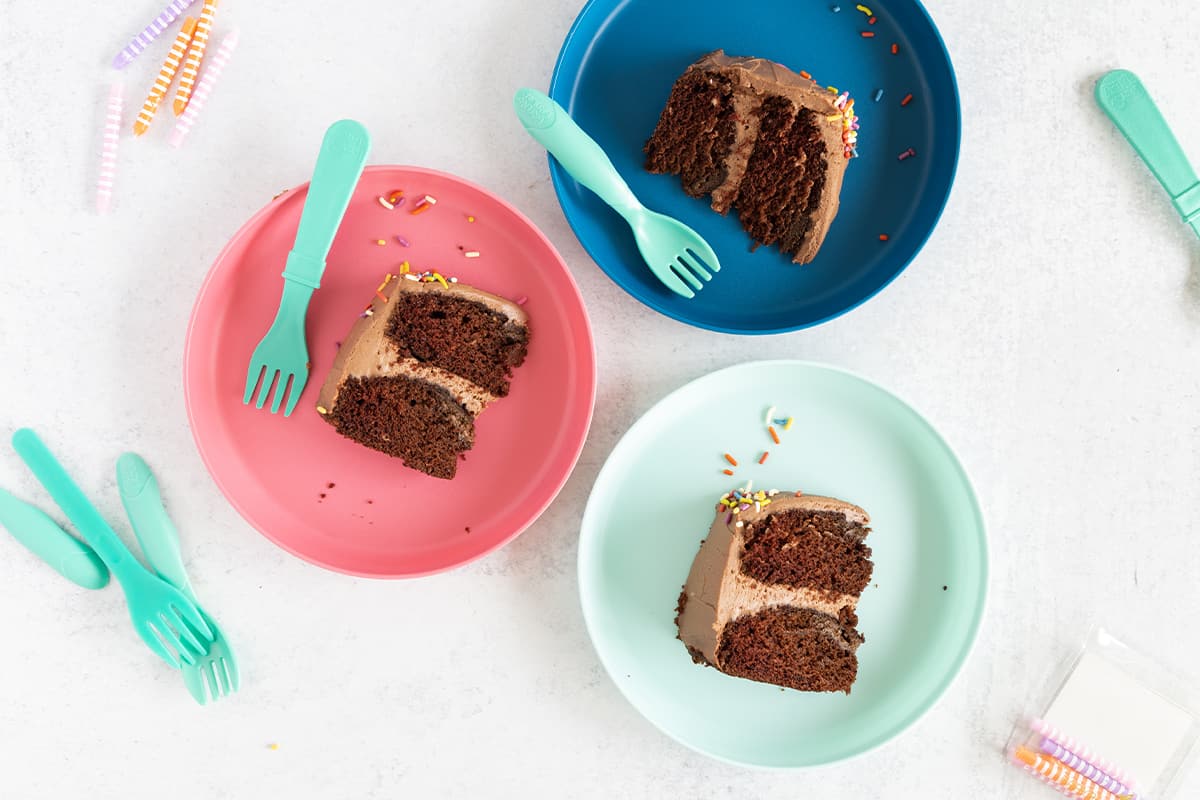
Best Tips for Success
- To make this in a 9-inch cake pan, use just one pan and bake for 16-20 minutes or until a cake tester inserted in the center comes out clean. Be sure to grease the pan well to ensure it doesn’t stick. Double the recipe to make a two layer 9-inch cake.
- To bake as cupcakes, use ¼ cup batter in each standard size muffin cup (greased well with nonstick spray) and bake for 14-16 minutes, or until a cake tester inserted into the center comes out cleanly.
- Gluten-free: Use cup-for-cup gluten-free flour blend in place of the wheat flour.
- Use a mix of all-purpose and whole wheat flour or all of one or the other. (All whole wheat will be a smidge denser.)
- Try to avoid over-baking to ensure the cake is moist and doesn’t crumble too much.
- Be sure to grease the pan well to ensure the cake doesn’t stick.
- If you are at all worried about your cakes sticking to the pans (these 6-inch pans do not tend to stick, but I can’t speak for every other cake pan) trace the pans onto parchment paper. Cut out the rounds, trimming slightly so they fit inside of the cakes. Place each round of parchment paper into the cake pan, then spray the paper and sides of the pan with nonstick spray. Proceed with the recipe.
Related Recipes
I’d love to hear your feedback if you try this recipe for your family, so please comment below to share!
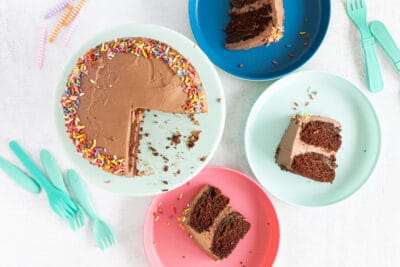
Healthy Chocolate Cake (Lower Sugar)
Ingredients
- 1½ cups all-purpose flour (or whole-wheat flour)
- ⅔ cup sugar
- 1 teaspoon baking soda
- ¼ teaspoon salt
- ⅓ cup cocoa powder (I like Saco or Hershey's Special Dark)
- 1 cup water
- ⅓ cup vegetable oil (or melted butter or avocado oil)
- 1 tablespoon white vinegar
- 1 teaspoon pure vanilla extract
- 1 recipe Quick Chocolate Frosting or Chocolate Cream Cheese Frosting
Instructions
- Preheat the oven to 350 degrees F and grease two 6-inch cake pans very well on the bottom and sides with nonstick spray. (I use classic Pam spray.)
- Add the ingredients to a medium bowl and whisk gently to combine. Divide the batter between the prepared pans, using about 1 cup and 2 tablespoons in each pan.
- Bake for 18-20 minutes or until the middle is firm to a light touch and a cake tester inserted into the center comes out clean. Try not to overbake.
- Let cool on a wire rack for 5 minutes, then carefully remove the cakes from the pans by running a paring knife around the edges to loosen. Working with one pan at a time, carefully turn the pan over onto a wire rack. The cakes should slide out easily. Let cool completely on the wire rack.
- To frost, place one cake onto a cake stand or plate. Add ⅓ of the frosting to the top of the cake. Spread to the edges. Top with the second layer and the remaining frosting, then spread over the top and the sides. Add sprinkles if desired.
Equipment
Notes
- Store leftovers wrapped well in the fridge. You can also freeze slices for future enjoyment. Wrap tightly in plastic wrap (wrapping slices on small paper plates makes this easy) and freeze for up to 6 months. Thaw at room temperature or in the fridge.
- You can make the cakes the day before you plan to serve. Let cool fully, then place on two separate plates and wrap well with plastic wrap. Store at room temperature. Frost just before serving if possible.
- Frost with my Quick Chocolate Frosting, Chocolate Cream Cheese Frosting, or Strawberry Frosting. You could also use classic Cream Cheese Frosting.
- To make this in a 9-inch cake pan, use just one pan and bake for 16-20 minutes or until a cake tester inserted in the center comes out clean. Be sure to grease the pan well to ensure it doesn’t stick. Double the recipe to make a two layer 9-inch cake.
- To bake as cupcakes, use ¼ cup batter in each standard size muffin cup (greased well with nonstick spray) and bake for 14-16 minutes, or until a cake tester inserted into the center comes out cleanly.
- Gluten-free: Use cup-for-cup gluten-free flour blend in place of the wheat flour.
- Use a mix of all-purpose and whole wheat flour or all of one or the other. (All whole wheat will be a smidge denser.)
- Try to avoid over-baking to ensure the cake is moist and doesn’t crumble too much.
- Be sure to grease the pan well to ensure the cake doesn’t stick.
- If you are at all worried about your cakes sticking to the pans, (these 6-inch pans do not tend to stick, but I can’t speak for every other cake pan) trace the pans onto parchment paper. Cut out the rounds, trimming slightly so they fit inside of the cakes. Place each round of parchment paper into the cake pan, then spray the paper and sides of the pan with nonstick spray. Proceed with the recipe.
Nutrition
This recipe was first published September 2020.









Hi! I used almond flour in place of GF flour and the mixture came out really liquid-y, but I am baking it anyway. It’s been over 20 minutes and the cake is still pretty liquid… any tips? Should I just get actual cup4cup GF flour?? Help appreciated thanks!
Hi- almond flour is not a good substitute for regular wheat flours as it absorbs liquids in a completely different way. A GF all purpose flour that is designed to replace wheat flour in a 1:1 ratio is the best option here. Enjoy!
Hi! I tried your recipe for the first time and I had a total fail – I tried to make one cake in a bigger tin (about 8inch size) and it came out a bit undercooked plus fell apart when I took it out the tin 🙁 Any idea what I did wrong?
Hi- I would check that your baking soda is fresh. That’s the only reason I can think of that this would happen.
Hi, I had similar issue here. I used 7 inch pan but still divided into 2. The first one looked okay when I took it out but it fell apart when I wanted to move to another plate. The second batch was undercooked (I only have 1 pan so I baked twice) so I ended up baking 10 mins more. I’m letting it sit for much longer time to avoid falling apart. I used fresh just opened baking Soda. If you have any input I appreciate it.
The easiest and most perfect chocolate cake ever! It came out amazingly dark (Oreo-dark!) and full of moisture and rich flavours – while still keeping its fluffiness!
A recipe to keep and repeat <3
Thanks for sharing it!
My son (nearly 6yo), daughter (2yo), and I made this today for my husband’s birthday and oh my goodness! We used melted butter in place of the oil. We also iced this cake with the strawberry cream cheese frosting recipe and used seedless raspberry spread between the two layers. This was a winning combination. My husband is generally very critical of cakes being too dry and he was very happy with this cake NOT being dry!! We’ll be making this cake again soon- my birthday is a few short days away!
Hi, I read your comment and was wondering how many tablespoons of butter did you use approx for this cake? I actually love the butter idea and want to try myself.
Thank you for this easy and tasty toddler friendly Chocolate cake recipe! I baked it for my sons 4th birthday today and couldn’t believe how quick it was with very simple ingredients. I had it all in my pantry. Dairy free, egg free, no use of softened butter and a one bowl recipe makes it a dish worth the 5 stars! I made it in a 9inch round cake pan which i greased well with melted butter. I used a chocolate ganache recipe from another blog. Thanks again Amy!
Like in your vanilla cake, would it be possible to use coconut sugar instead of white sugar? Thank you!
Sure, that will work similarly.
So easy and delicious! I’ve made this a few times. For freezing, is it possible to freeze it iced?
Yes, it freezes really well iced. I wrap slices or a bigger piece in plastic wrap, then put into a freezer bag.
I’ve made this twice now in my 2C Souper Cubes and it turns out perfectly. Fan favorite in our house, and is a toddler-friendly recipe for the measuring/making part too!
Love that!
Absolutely delicious! Didn’t make the frosting but ate with some vanilla ice cream and it was amazing.
would melted coconut oil work here instead of vegetable or canola oil?
I’m doing this receipe for my 1 year old and was wondering how many cupcakes it makes. I want to do 24. I’m also using your strawberry cream cheese icing. Thanks in advance.
I would double the recipe. Enjoy!!
Thank you so much for sharing this recipe! I’ve made it twice as a two-tier 9in round cake for my husband’s birthday with peanut butter icing. We tend to cut sugar in a lot of our recipes due to personal preference and pre-diabetes. I wasn’t sure about doing that with this recipe since it was already lower in sugar, but oh my goodness, I’m so glad I did. With half the sugar, it tasted perfect! And I’m saying that as someone who does not like really dark chocolate. It still had plenty of sweetness on its own and with the frosting. I figured I’d share our slight adjustment in case anyone else was hoping for closer to 8.5g of sugar per slice vs 17g. Thanks again!
I just made this cake and doubled the recipe. I substituted the white vinegar with apple cider vinegar and the canola oil with coconut oil. I added chocolate chips to the cake as well. It came out great, very moist.
I baked this in three 4-inch round pans (20-23 mins) and the extra batter I used to make 24 mini cupcakes (15-18 mins) and one 4 inch mini Bundt cake (20-23 mins). I used coconut oil and flour coat my pans to ensure it didn’t stick to the pan. Perfect consistency and didn’t stick!
Absolutely delicious, soft and spongy, thank you so much! I did it with butter and I used 1 teaspoon of cream of tartar instead of white vinegar.
I baked it in a 20cm cake mould for nearly 40 minutes, without fan, because the skewer came out dirty before that when testing. My oven is usually in the slow side, but still a significant difference, maybe because of the size of the mould and no fan.
I followed the recipe exactly (using the melted butter option instead of vegetable oil) and got near-pancakes. What could be the problem?
I haven’t made it with butter, so I don’t know if that impacted it, but most likely the baking soda wasn’t active. If that’s not working right, it won’t rise or bake through.
Same, very flat. Used butter too. Could be the oven too?I have a classic gas old oven
It’s really good as written in the recipe. I can’t speak to the oven but that could be part of it, but it might actually be the use of butter instead of oil as directed.