Transform pantry staples into the yummiest Homemade Crackers recipe with this easy method. These crackers make a perfect snack with cheese, hummus, or fruit. Plus, they are easy to make and stay crispy for weeks!

We’ve long been making my easy Cheese Crackers recipe as an occasional kitchen activity to do together, but it’s taken me longer to figure out how to make homemade plain crackers. Making crackers that are crisp, but still easy for kids to bite and chew, that hold their crispiness at room temperature in storage for weeks, and that taste as good as store-bought is no easy feat, but this recipe has done it!
It’s essentially a savory version of my Graham Crackers recipe and is so much easier to make than you might think.
With basic pantry staples, seasoning and herbs of your choosing, and a really simple method, you can make these homemade crackers recipe to share with the kids as an easy toddler snack, as part of a Snack Dinner, or for easy kids lunches. They really are SO good…they taste a little like Wheat Thins!
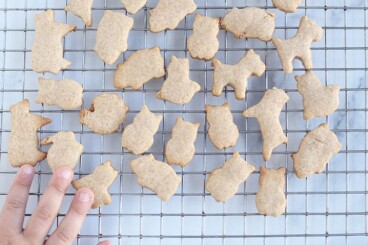
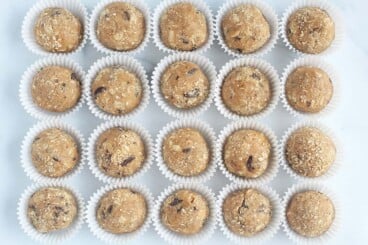
(You may also like Animal Crackers, Mini Chocolate Chip Muffins, and Protein Snacks for Kids.)
Table of Contents
Your toddler won’t eat? Help is here!
Sign up for our email updates to get tips and ideas sent to your inbox.
Ingredients You Need
Here’s a look at the ingredients you need to have on hand to make this Homemade Crackers recipe so you know what to pick up from the store or have ready.

- Whole wheat flour: I use a base of whole wheat flour in this recipe for fiber and whole grains. It also adds a nice mellow nutty flavor.
- Sugar: A smidge of sugar helps create a crisp texture in the homemade crackers.
- Baking powder: A little baking powder ensures that the crackers bake through with the right texture.
- Salt: We add a little salt to the batter, and there is the option to add coarse salt on top of the crackers for extra flavor.
- Butter: I bake with unsalted butter so that’s what I use here. This way, I can control the salt in the recipe.
- Milk: You can use whole milk, low-fat milk, or a plain unsweetened nondairy milk in this recipe.
- Honey: A little honey helps the texture of the crackers be most similar to store bought. (For kids under age 1, omit the honey.)
Optional Flavor Additions
You can add cinnamon, rosemary, or garlic powder as optional flavor enhancements. This allows you to customize the crackers for how your family enjoys them.
You also have the option to top with coarse salt or sesame seeds.
Step-by-Step Instructions
Here’s a preview of how to make this homemade crackers recipe so you know what to expect from the process. Scroll down to the end of this post for the full information, including the amounts and the timing.

Step 1. Place all ingredients into a bowl and use your hand to mix together to form a dough.

Step 2. Flatten the dough into a disk.

Step 3. Roll the dough out between two pieces of parchment paper.

Step 4. Cut out with a cookie cutter or sharp knife. Transfer to a prepared baking sheet and bake.

Frequently Asked Questions
You can store these homemade crackers for about 3 weeks in an airtight storage container or bag at room temperature.
Be sure not to underbake to start, then let cool completely on a wire rack. Store, with in a sealed storage bag or an airtight container. This recipe stayed crisp without any special effort!
You need basic ingredients, then a rolling pin and a cookie cutter, or a sharp knife or even a pizza cutter.
Serving Suggestions
You can serve these crackers on their own or pair with Yogurt Dip, Cottage Cheese Dip, diced fruit and vegetables, or a toddler smoothie. (Or really anything that sounds good to you!)
How to Store
Let crackers cool completely on the baking sheet, then store in an airtight container at room temperature for up to 3 weeks.
Best Tips for Success
- Use a 1:1 style of gluten-free flour blend, if desired, to replace the whole wheat flour. You may need an extra tablespoon or so of the flour to make sure the dough isn’t too sticky.
- You can brush the crackers with melted butter before baking if you like.
- Try to get the crackers uniform in thickness so they bake evenly. It’s okay if they’re not perfect—I usually have a few corners that are a little darker than others but they are still yummy!
- Use maple syrup in place of honey for kids under age 1 or omit sweetener.
- Use dairy-free milk if desired.
- Cut into any other shapes you prefer. I used square and round cookie cutters.
- Pack as a lunchbox idea for kids with cheese, fruit, and veggies.
Related Recipes


I’d love to hear your feedback on this post, so please rate and comment below!

Homemade Crackers Recipe
Ingredients
- 1 cup whole wheat flour
- 1 tablespoon sugar
- ½ teaspoon baking powder
- ½ teaspoon salt
- ¼ cup unsalted butter (softened at room temperature)
- 2 tablespoons milk
- 1 tablespoon honey
- ½ teaspoon cinnamon, rosemary, or garlic powder (optional)
Instructions
- Preheat the oven to 375 degree F and line a baking sheet with parchment paper.
- Place all ingredients into a bowl and use your hands to mix together to form a dough.
- (If the dough is a little crumbly, be sure it’s thoroughly combined. If it’s still crumbly, add ½-1 tablespoon additional milk until it comes together. You can also form the dough by pulsing in a food processor.)
- Flatten the dough into a disk.
- Roll the dough ¼-inch thick between two pieces of parchment paper. Try to get the crackers uniform in thickness so they bake in the same amount of time.
- Cut out with a 2-inch square or round cookie cutter. Transfer to the prepared baking sheet. Use a fork to poke holes in each cracker.
- Set the timer for 12 minutes and bake. Continue baking in 2 minute increments up to 18 minutes until the tops and edges are lightly golden brown. Expect the crackers to visually brown as they bake. (Mine usually take 16 minutes.)
- Remove from the oven and let crackers cool completely on the baking sheet. They will firm up as they cool.
- Store crackers in an airtight container for up to 3 weeks.
Equipment
- storage container
Notes
- Let crackers cool completely on the baking sheet, then store in an airtight container at room temperature for up to 3 weeks.
- Use a 1:1 style of gluten-free flour blend, if desired, to replace the whole wheat flour. You may need an extra tablespoon or so of the flour to make sure the dough isn’t too sticky.
- You can brush the crackers with melted butter before baking if you like.
- Use maple syrup in place of honey for kids under age 1.
- Use dairy-free milk if desired.
- Cut into any other shapes you prefer.


Hi what temperature to bake at?
The full recipe is always at the bottom of the post for you.
I made these with my toddler and he loved the experience…but they came out way too hard to bite and seemed a bit too thick. While I don’t think I overcooked them (oven is calibrated and watched the time), it seems that must have been the case. I measured them after the fact and they were exactly 1/4 inch thick. Besides reducing the cooking time, would you recommend rolling them a bit thinner or does that become an issue?
Hi- You can try rolling them a little more thinly and check them right at the end of the shorter baking time. Thanks for the feedback!
Just made these with my toddler and let him use small star and flower veggie cutters to make the shapes. At 1/4 inch they seem really thick–I did measure them after the fact to make sure I was on target. Any experience making these thinner? Also, I cooked them for about 14 minutes and they came out overcooked (a bit too hard to bite). Possible I overworked the dough or just cooked too long?
You could try them a little thinner!
Hi, if I sprinkled chia seeds or flax seeds or seasoned seeds on top of it, will they get burnt?
That hasn’t happened when I’ve done it!
Will the recipe suffer if I don’t add the sugar?
I tried that first and I found them to be a little bland. I even cut it in half from what it is here and I still thought they were too bland. So you are free to experiment, but that was my experience.
It says you can sub a 1:1 gluten free flour for the whole wheat, but could I also sub all purpose for the whole wheat?
Sure, that will be fine too. Enjoy
Does Almond flour can be used instead of wheat flour?
No, almond flour is not a good direct substitute for wheat flour since it absorbs liquids completely differently.