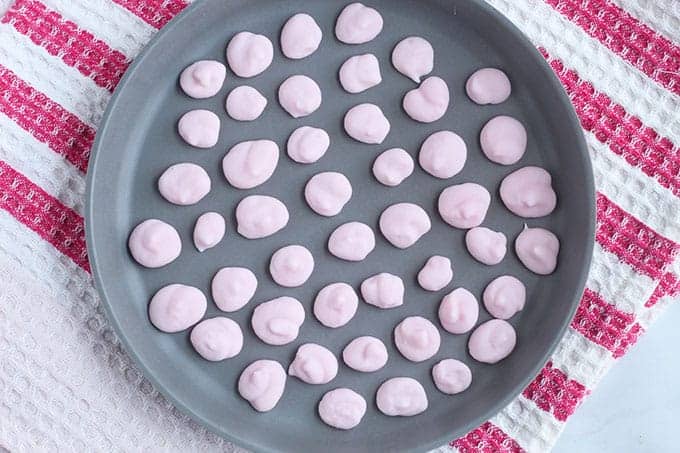
Making a batch of Yogurt Melts at home is a simple way to change up how you offer yogurt—and the healthy fats, probiotics, and calcium that it offers in a super fun (and easy to eat) format!
Homemade Yogurt Melts
Packaged yogurt melts from the store are a fairly ubiquitous baby and toddler snack these days, but it’s also fun to make a version of them at home. These aren’t freeze-dried like the store-bought ones are, but they’re real yogurt frozen into little bites. The result are mini yogurt bites that the kids can pick up with their hands as finger food for a nutritious snack that’s also really fun!
TIP: I love this as a way to change up how we serve yogurt, especially if the kids aren’t fans of it in a bowl or if they’ve gotten bored of how it’s been served lately.
Ingredients You Need
To make this easy snack you need either baby yogurt OR plain whole milk Greek yogurt and a baby food puree. You can use any kind of baby yogurt you like, such as Stonyfield which is widely available (and is sometimes offered in a no-added-sugar option too).
Step-by-Step Process
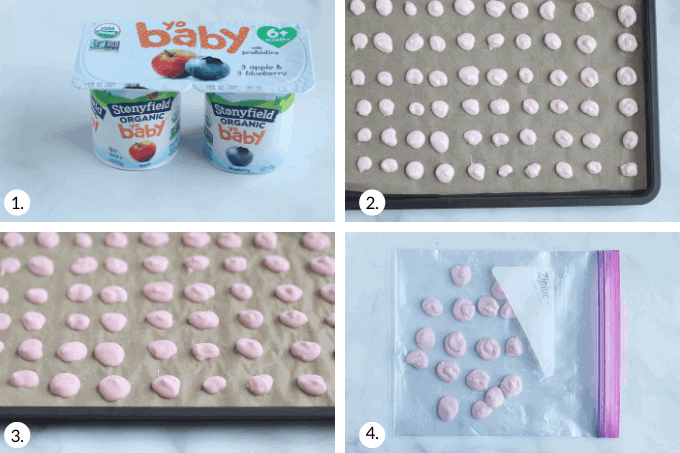
Here’s a look at the process involved in this recipe for yogurt bites. Scroll down to the bottom of this post for the full information.
- Choose your yogurt.
- Add to a plastic bag and pipe out.
- Freeze.
- Serve or transfer to a storage bag.
TIP: I like to let these sit at room temperature for 3-5 minutes before serving to ensure they are a nice and not too hard texture for the kids. (They do thaw the longer they are out of the freezer, but in my experience they’re usually eaten by then!)
Frequently Asked Questions
Store bought yogurt melts are more like baby puffs and are typically freeze-dried and shelf stable. These are real yogurt that’s been frozen, so they are not shelf-stable.
It varies by type but this recipe is straight yogurt so they’re a great source of calcium, probiotics, and the fats that little kids need for development.
Babies can eat yogurt melts after they’re about 9 months old, or when they’ve developed the pincer grasp, or the ability to pick up small pieces of food with their fingers.
They can be, as the ones from the store can absorb moisture if not stored in an airtight container and turn a little marshmallow-y. The best way to avoid choking with homemade yogurt melts is to let them sit at room temperature for 3-5 minutes after pulling them from the fridge so they soften a smidge. You can also make them a little smaller if you prefer!
Yes, they melt on your tongue with your body heat.
TIP: Need a snack to take on the go? The Yogurt Melts Variety Pack from Amara Organic Baby Food is one of my go-tos! The melts are made with organic fruits, veggies, and coconut milk and are a quick-dissolve, safe snack for little kids. (sponsored)
Best Tips for Success
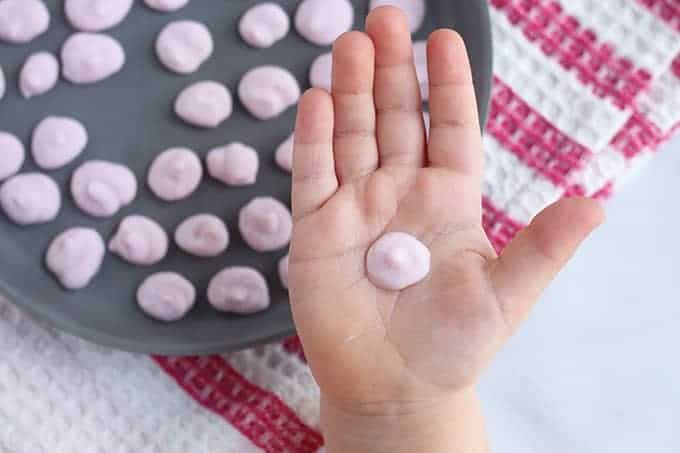
- The best way to avoid choking with homemade yogurt melts is to let them sit at room temperature for 3-5 minutes after pulling them from the fridge so they soften a smidge. (You can see the one in my daughter’s hand above is starting to thaw.)
- I usually make them about the size of a dime, though you can go a little smaller, or about the size of a pencil eraser if you prefer. (I would recommend that smaller size for kids under age 2.)
- You can use baby yogurt OR plain whole milk Greek yogurt and a baby food puree.
- They do thaw the longer they are out of the freezer, but in my experience they’re usually eaten by then.
- Store and leftovers in a sealed freezer bag for up to a month.
Related Recipes
Baby Food
10 Easy Homemade Baby Food Ideas
Baby Food
Best Toddler and Baby Puffs
Baby Food
Master List of Baby Snacks
I’d love to hear your feedback on this recipe if you try it, so please comment below and leave a star rating!
Favorite Yogurt Melts (Easiest Yogurt Bites!)
Ingredients
- 4 ounce container baby yogurt (OR ½ cup plain whole milk Greek yogurt and 2 tablespoons any baby food puree)
Instructions
- Line a baking sheet with parchment paper.
- Add the yogurt to a zip top bag and seal. Cut off one bottom corner and gently squeeze out little dots of yogurt in rows on the prepared tray. (I make them about the size of a dime, though you can go smaller to the size of a pencil eraser.)
- Place tray into the freezer and freeze for at least 2 hours and up to overnight.
- To serve, remove from the freezer and let sit at room temperature for 3-5 minutes before serving to ensure they aren’t frozen solid. (You can try one to make sure it melts easily on your tongue!) Babies and toddlers should be able to pick them up with their hands.
Equipment
Video
Notes
- You can transfer the melts from the parchment, once fully frozen, into a zip top freezer bag for up to a month.
- You can use either store bought baby yogurt OR a mixture of plain whole milk Greek yogurt and a little baby food puree in any flavor you like.
- Let sit at room temperature for 3-5 minutes before serving to allow to soften a smidge.
- I usually make them about the size of a dime, though you can go a little smaller, or about the size of a pencil eraser if you prefer. (I would recommend that smaller size for kids under age 2.)
- These do thaw as they sit out of the freezer at room temperature and are best served soon after pulling them from the freezer.



Can I use plain whole milk yogurt to make these? Trying to figure out what to make with my leftover yogurt – but it’s not Greek.
I was wondering the same, did you try this? How did it turn out?